Fuzzy Hash Hunting with Velociraptor and Bifract
Fuzzy hashing isn’t a new idea, and most defenders gave up on exact hash matching a long time ago. What’s rare is seeing similarity matching actually wired into a pipeline: a hash calculated on every executable as it runs, a curated list of known bad digests to compare against, and somewhere to do the comparison that holds up at fleet scale. In this post I’ll show how to set up a TLSH pipeline from collection to alerting, end to end.
TLSH produces a digest you compare by distance, so two builds of the same malware land close together even when their exact hashes have nothing in common. That makes it useful for threat hunting and for identifying malware families.
In a previous post I showed how you can use Velociraptor to enrich Sysmon events, such as event id 1 process creation events, with additional information like TLSH hashes.
Collecting hashes with Velociraptor
Velociraptor provides a tlsh_hash function which I use in Windows.EventLogs.SysmonProcessEnriched. When Velociraptor reads a process creation event from the event log, it will calculate the TLSH hash on the fly, and staple the hash onto the result.
/* 1. First, we set up two functions to calculate the authenticode
and TLSH hashes respectively. */
LET get_auth_cache(Image) = authenticode(filename=Image)

LET get_tlsh_cache(Image) = tlsh_hash(path=Image)

/* 2. As process creation events flow in, we enrich them with the authenticode signature
and the TLSH hash, which we cache, so that we don't have to recalculate if the same
process executes in rapid succession.*/
SELECT *, cache(period=CachePeriod,
                func=get_auth_cache(Image=EventData.Image),
                key=str(str=EventData.Hashes),
                name="auth") AS Authenticode,
        if(condition=(EventData.Image =~ TLSHImageRegex),
          then=cache(period=CachePeriod,
                      func=get_tlsh_cache(Image=EventData.Image),
                      key=str(str=EventData.Hashes),
                      name="tlsh")) AS TLSH,
        join(array=process_tracker_callchain(id=EventData.ProcessId).Data.Name,
            sep="->") AS CallChain

/* 3. We delay rows we read from the event log so we don't lose the race condition
with the process tracker, which also uses the same event log. We use the process
tracker to add the full call chain onto the log. */
FROM delay(
  query={
    SELECT *
    FROM watch_evtx(
      filename="C:\\Windows\\system32\\winevt\\Logs\\Microsoft-Windows-Sysmon%4Operational.evtx")
    WHERE System.EventID.Value = 1
  },
  delay=1)
We can also use Velociraptor to calculate TLSH hashes of files on the filesystem like so:
SELECT OSPath, tlsh_hash(path=OSPath), Size
FROM glob(globs=["C:/Users/**/Downloads/*"])
This same logic can be wrapped into a simple re-usable artifact that we can run ad-hoc during IR or threat hunting:
name: Custom.Windows.TLSH.Glob
description: |
   Calculate TLSH hashes of all files matching glob.

type: CLIENT

parameters:
   - name: TargetGlob
     description: "Glob to target."
     default: "C:/Users/**/Downloads/*"

sources:
  - precondition:
      SELECT OS From info() where OS = 'windows'

    query: |
      SELECT OSPath,
             Size,
             tlsh_hash(path=OSPath) AS tlsh
      FROM glob(globs=TargetGlob)
One thing to keep in mind when you run this, TLSH needs at least 50 bytes of input with enough variation in it to work with. If you glob a directory and some of the rows come back empty, that’s often why.
Getting the data into Bifract
Now that we have TLSH hashes in-hand, we need an engine that can compare them. I’ll be using an open source solution I developed, Bifract, but you can use anything capable of comparing TLSH hashes. If you’d rather script it, py-tlsh gives you the same distance calculation in a few lines of Python.
If you don’t have Bifract running yet, the setup wizard installs it on a single Linux host and handles SSL, passwords, Docker Compose, and database initialization:
curl -sfL https://docs.bifract.io/install.sh | sh
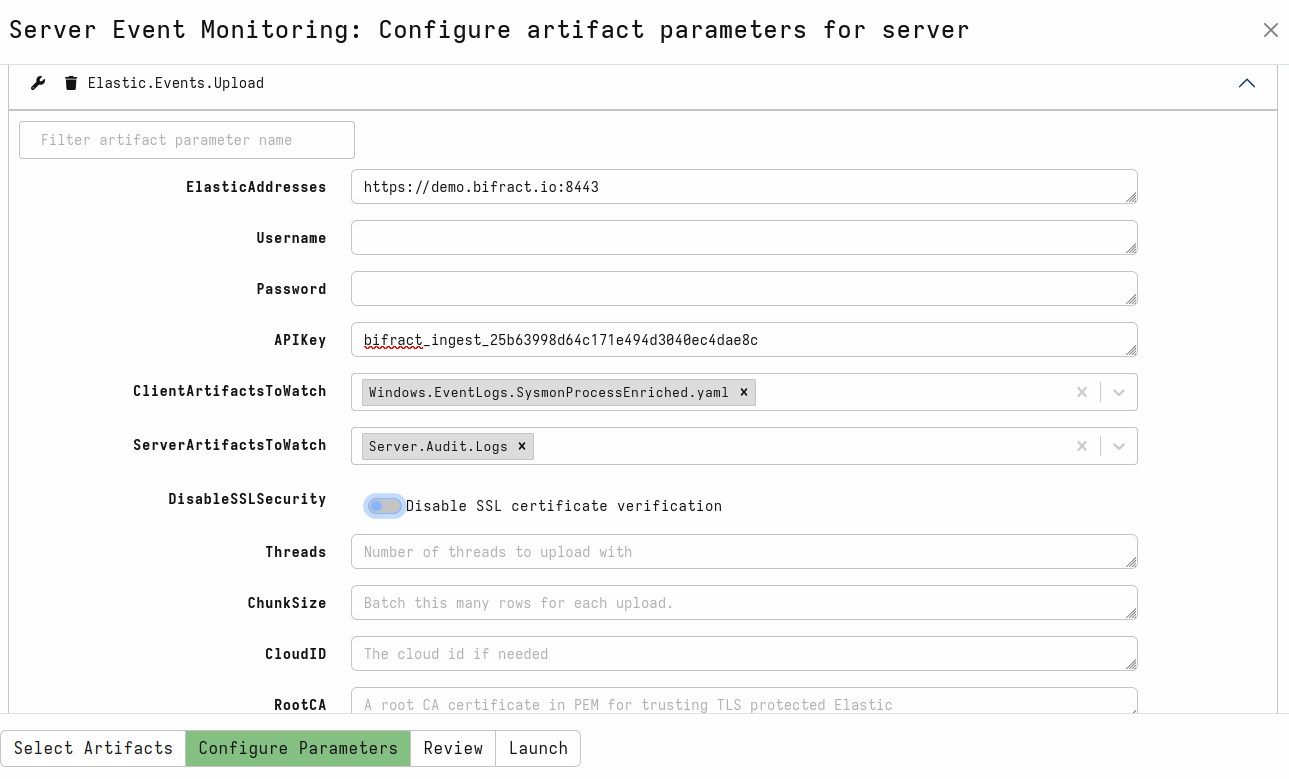
To send data from Velociraptor to Bifract we’ll configure two artifacts. First, Elastic.Events.Upload to send our Sysmon process executions:
Next, we’ll use Elastic.Flows.Upload to send our ad-hoc results from Custom.Windows.TLSH.Glob to Bifract.
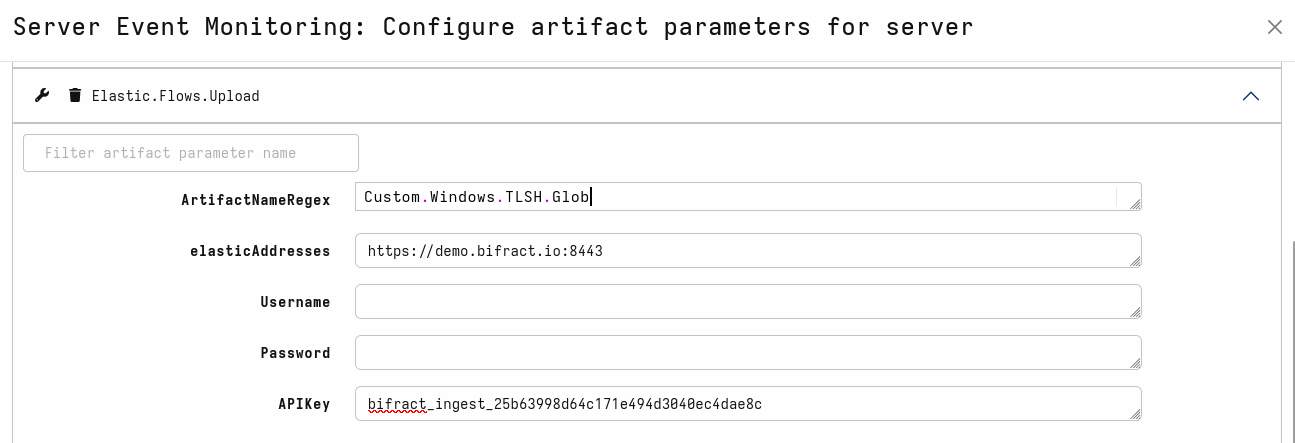
In each case we set the elastic address to our Bifract server’s ingest port on 8443/https and we use a Bifract ingest token as the API key.
Set up the model and hash list
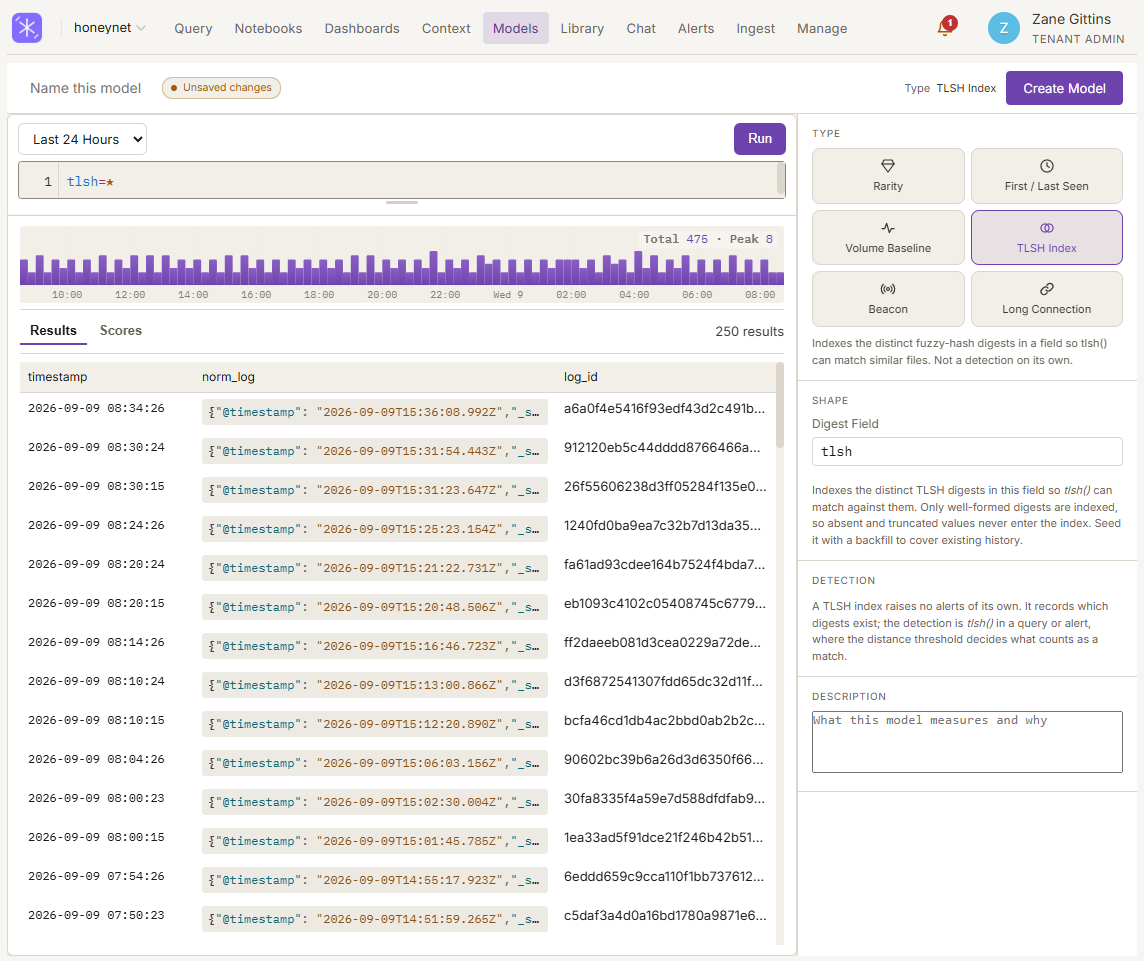
In order to use the tlsh() function in Bifract we first need to make a new TLSH model, navigate to Models–>New Model and select TLSH Index. For the filter enter tlsh=* and for the field tlsh.
If you already have TLSH data in Bifract, run a backfill on the model once it’s created. A new model only indexes digests that arrive after it exists, so with the model present but no backfill the query runs happily and simply finds nothing in your older data.
Next we need a known bad list to compare against. An excellent freely available one is the CelesTLSH Hash Database by Magonia Research. Download the all_attack_tools_hashes.csv from their Github repository, then navigate to Context–>New List.
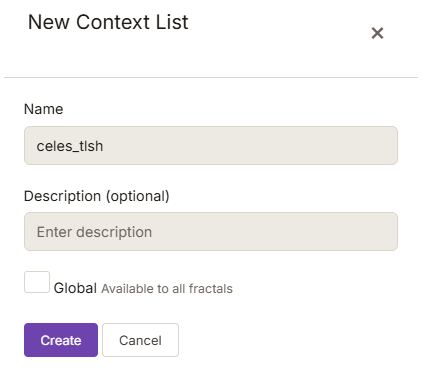
Select Import CSV to upload the data to Bifract, in my CSV I’ve cut everything besides two columns, the tlsh hash, and the threat name. You can clean up the CSV similarly using the following command:
awk -F, 'BEGIN { print "tlsh,threat_name" }
     match($0, /T1[0-9A-F]{70}/) {
       name = $1; sub(/.*\//, "", name)
       print substr($0, RSTART, RLENGTH) "," tolower(name)
     }' all_attack_tools_hashes.csv > celes_tlsh.csv
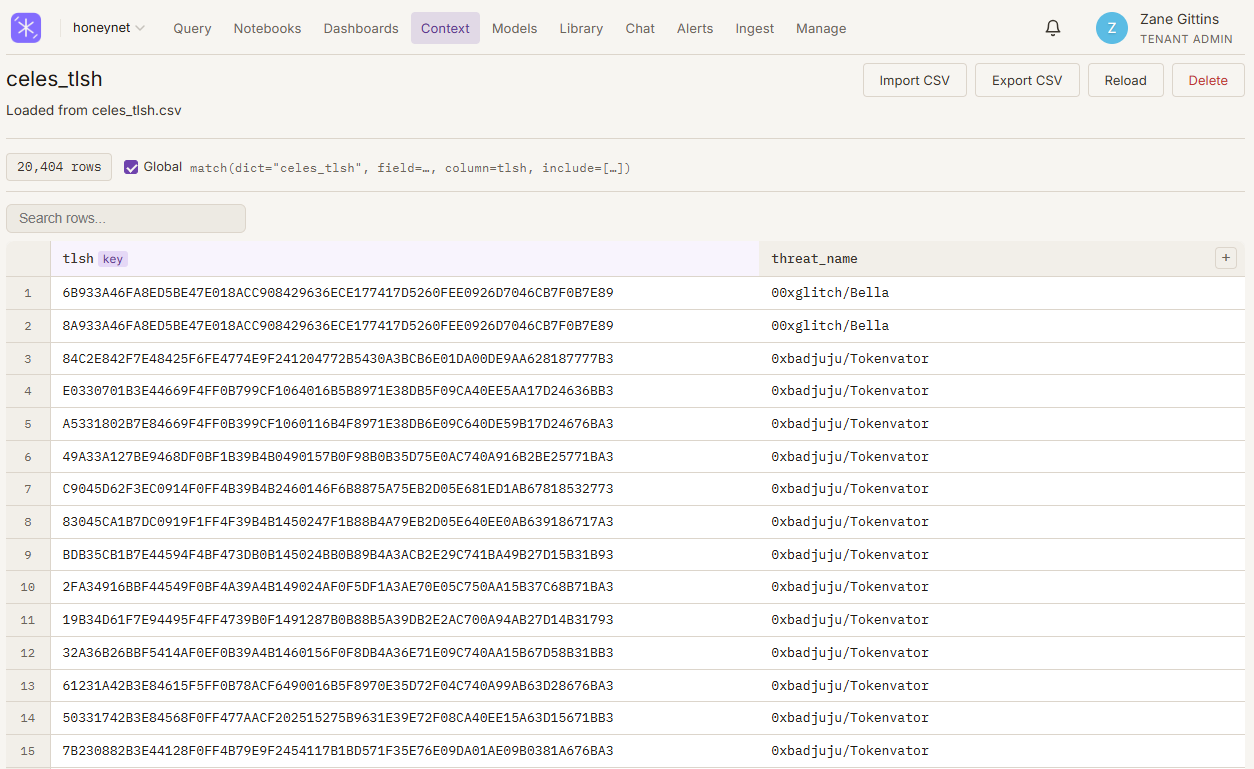
Once imported, you should have a list with ~20k rows:
Hunting with TLSH
Now that Bifract is ready to compare hashes, let’s collect some with Velociraptor. Run the example artifact Custom.Windows.TLSH.Glob against a directory containing suspicious executables, and view the results in Velociraptor.

These will flow automatically to Bifract thanks to the integration we set up earlier. We can now compare these against the CelesTLSH list using the following query:
artifact="Custom.Windows.TLSH.Glob" AND tlsh=*
| tlsh(field=tlsh,dict="celes_tlsh",threshold=50)
| match(dict="celes_tlsh",field=tlsh_match,column=tlsh,include="threat_name")
| table(artifact,os_path,tlsh_distance,threat_name)
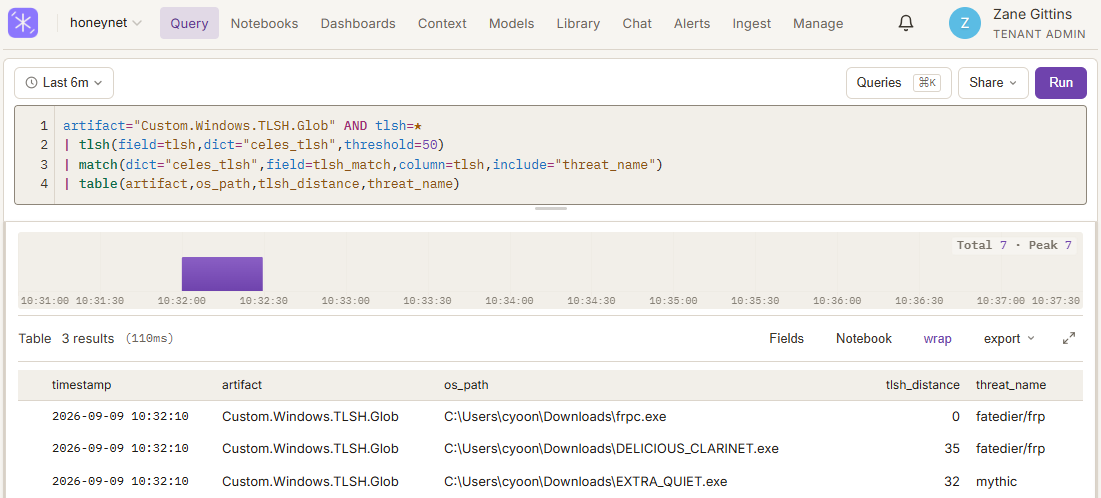
The tlsh_distance column is how far apart the two hashes are, zero means the files are identical and the number climbs as they diverge. Scores in the 10 to 50 range still mean the files are quite similar, and that range is where the value is, because those are the files an exact hash would have missed completely. Tighten the threshold if you’re getting too much noise, loosen it if you’re missing variants you expect to catch. In the image above we received an exact match (score 0) on fatedier/frp and a very close match (score 32) for mythic C2, all warranting further investigation.
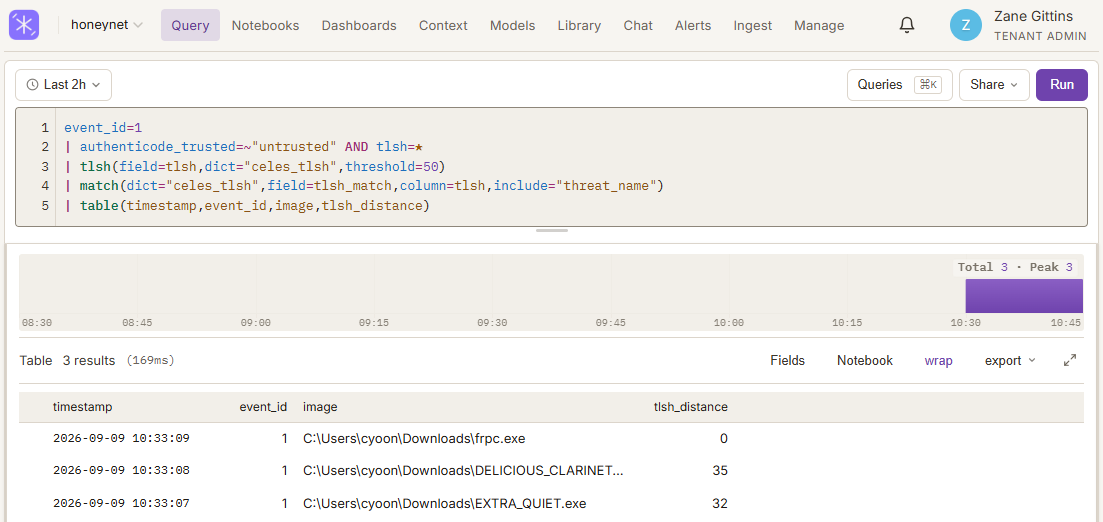
We can also check the distance of TLSH hashes from our enriched Sysmon logs. Here I filter to unsigned binaries first, because a close match on a process that also isn’t signed is a much stronger signal than either feature on its own:
event_id=1
| authenticode_trusted=~"untrusted" AND tlsh=*
| tlsh(field=tlsh,dict="celes_tlsh",threshold=50)
| match(dict="celes_tlsh",field=tlsh_match,column=tlsh,include="threat_name")
| table(timestamp,event_id,image,threat_name,tlsh_distance)
Alerting on matches
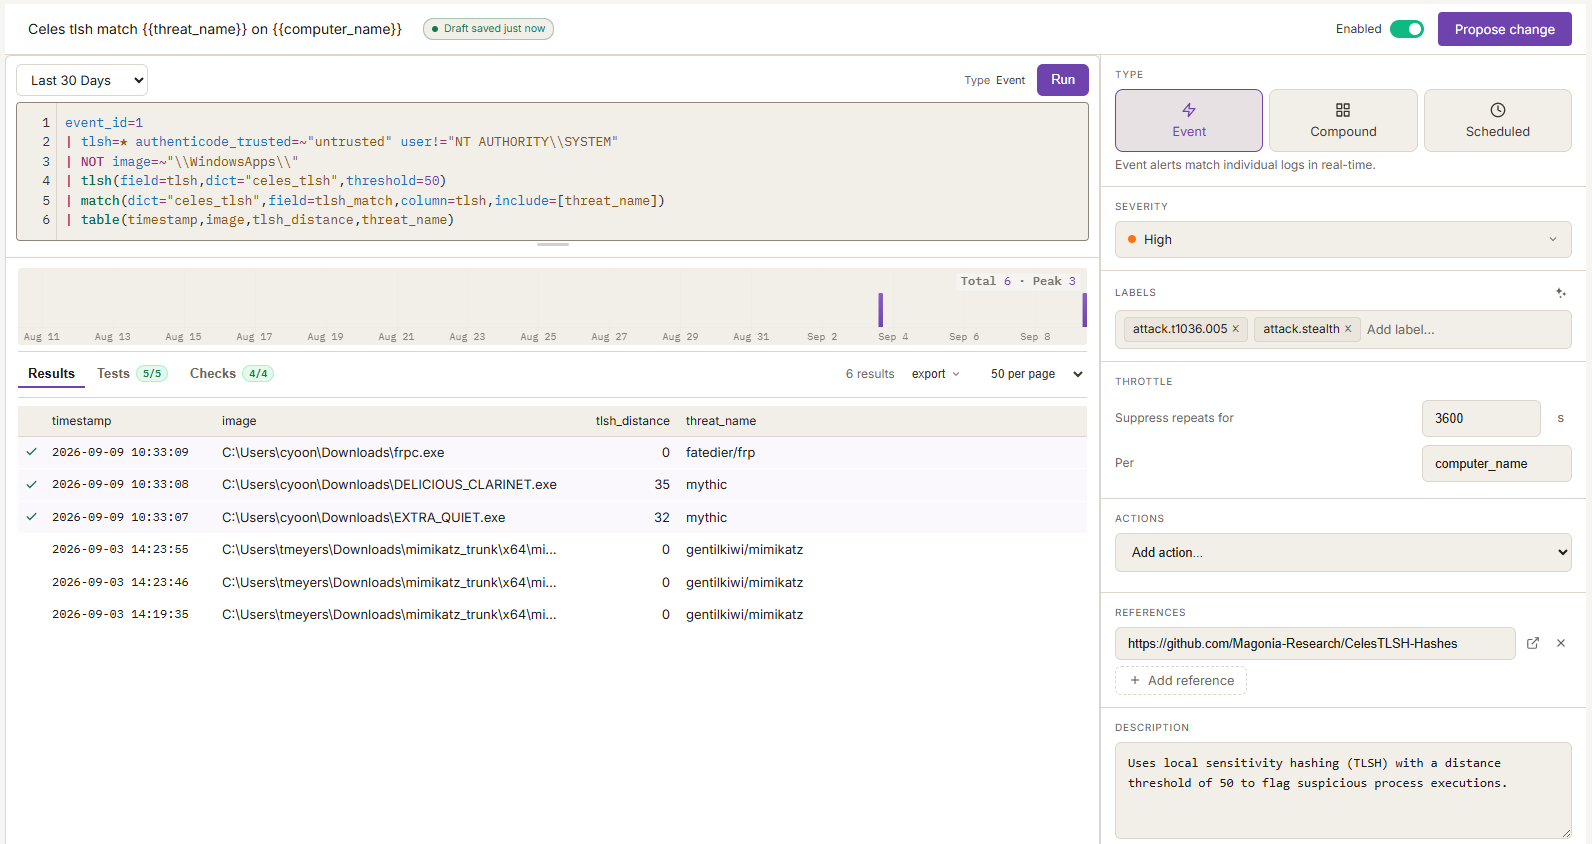
Lastly, we can turn that query into an alert, so we are notified of future suspicious executions. The signing filter is what makes it alertable: in my experience TLSH is great for malware family identification and threat hunting, but too low fidelity to alert on by itself. Having our TLSH hashes alongside the rest of our enriched Sysmon data in Bifract allows us to match on multiple features, yielding higher fidelity alerts so we don’t overwhelm the SOC.
Conclusion
Everything here uses free and open source tools, so you can follow along in your own homelab. Velociraptor calculates the hashes, CelesTLSH supplies the list, and the comparison is a single query in Bifract. That makes similarity matching a cheap capability to add to a fleet you are already collecting from.
If you want to try this yourself, the Bifract docs will get you set up, and the source is on GitHub. Issues and contributions are always welcome.